
티스토리 뷰
- JSP를 이용해 파일을 업로드하는 방법을 알아 본다.
파일 업로드 라이브러리 설치
- 파일 업로드 기능을 사용하려면 오픈 소스 라이브러리를 설치해야 한다.
- 다음 사이트에 접속하여 commons-fileupload-1.3.3-bin.zip 파일을 다운로드 한다.
https://archive.apache.org/dist/commons/fileupload/binaries/
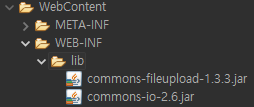
- 다운로드 받은 zip 파일의 압축을 해제하고 다음 파일을 프로젝트의 WebContent/WEB-INF/lib 폴더 안에 위치시킨다.
- 다음은 commons-io-2.6.jar 파일을 다운로드해야 한다. 다음 사이트에서 commons-io-2.6-bin.zip 파일을 다운로드한다.
https://archive.apache.org/dist/commons/io/binaries/
Index of /dist/commons/io/binaries
archive.apache.org
- 다운로드한 zip 파일을 압축 해제하고 commons-io-2.6.jar 파일을 프로젝트의 WebContent/WEB-INF/lib 폴더 안에
위치시킨다.
파일 업로드 API
- 파일 업로드 라이브러리에서 제공하는 클래스에는 DiskFileItemFactory, ServletFileUpload가 있다.
DiskFileItemFactory 클래스의 메서드
| 메서드 | 기능 |
| setRepository() | 파일을 저장할 디렉터리를 설정한다. |
| setSizeThreadhold() | 최대 업로드 가능한 파일 크기를 설정 |
ServletFileUpload 클래스의 메서드
| 메서드 | 기능 |
| parseRequest() | 전송된 매개변수를 List 객체로 얻는다. |
| getItemIterator() | 전송된 매개변수를 Iterator 타입으로 얻는다. |
파일 업로드 예
- 이제 설치한 라이브러리를 이용해 파일을 업로드해 보자.
- 자바 패키지를 생성하고 FileUpload.java 파일을 생성한다. 또 WebContent 안에 업로드 폼으로 사용할 uploadForm.jsp 파일을 생성한다.
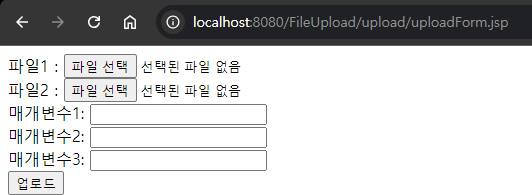
* uploadForm.jsp
- 파일을 업로드하는 페이지를 만든다. 파일 업로드창에서 파일을 업로드할 때 <form> 태그의 encType 속성은 반드시
multipart/form-data로 지정해야 한다.
<%@ page language="java" contentType="text/html; charset=UTF-8"
    pageEncoding="UTF-8" isELIgnored="false"%>

<%@ taglib prefix="c" uri="http://java.sun.com/jsp/jstl/core" %>
<c:set var="contextPath" value="${pageContext.request.contextPath }" />

<!DOCTYPE html>
<html>
<head>
<meta charset="UTF-8">
<title>File Upload</title>
</head>
<body>
	<form action="${contextPath }/upload.do" method="post" encType="multipart/form-data">
	파일1 : <input type="file" name="file1" ><br>
	파일2 : <input type="file" name="file2" ><br>
	매개변수1: <input type="text" name="param1"><br>
	매개변수2: <input type="text" name="param2"><br>
	매개변수3: <input type="text" name="param3"><br>
	<input type="submit" value="업로드" />
	</form>
</body>
</html>
* FileUpload.java
- 파일 업로드를 처리하는 서브릿을 작성한다.
- 라이브러리에서 제공하는 DiskFileItemFactory 클래스를 이용해 저장 위치와 업로드 가능한 최대 파일 크기를 설정한다.
- 그리고 ServletFileUpload 클래스를 이용해 파일 업로드창에서 업로드된 파일과 매개변수에 대한 정보를 가져와
파일을 업로드하고 매개변수 값을 출력한다.
package upload;

import java.io.File;
import java.io.IOException;
import java.util.List;

import javax.servlet.ServletException;
import javax.servlet.annotation.WebServlet;
import javax.servlet.http.HttpServlet;
import javax.servlet.http.HttpServletRequest;
import javax.servlet.http.HttpServletResponse;

import org.apache.commons.fileupload.FileItem;
import org.apache.commons.fileupload.disk.DiskFileItemFactory;
import org.apache.commons.fileupload.servlet.ServletFileUpload;

/**
 * Servlet implementation class FileUpload
 */
@WebServlet("/upload.do")
public class FileUpload extends HttpServlet {
	private static final long serialVersionUID = 1L;

	protected void doGet(HttpServletRequest request, HttpServletResponse response) throws ServletException, IOException {
		doHandle(request, response);
	}


	protected void doPost(HttpServletRequest request, HttpServletResponse response) throws ServletException, IOException {
		doHandle(request, response);
	}

	public void doHandle(HttpServletRequest request, HttpServletResponse response) throws ServletException, IOException {
		request.setCharacterEncoding("utf-8");
		String encoding = "utf-8";
		File currentDirPath = new File("F:\\workspace\\UploadTest"); // 업로드할 파일 경로를 지정

		DiskFileItemFactory factory = new DiskFileItemFactory(); // '파일 저장 위치'와 '최대 업로드 크기'를 지정하기 위한 객체 생성
		factory.setRepository(currentDirPath); // 파일 경로를 설정
		factory.setSizeThreshold(1024*1024); // 최대 업로드 가능한 파일 크기를 설정
		ServletFileUpload upload = new ServletFileUpload(factory); // 파일 업로드 창에서 업로드된 파일과 매개변수에 대한 정보를 가져올 객체 생성

		try {
			List items = upload.parseRequest(request); // request 객체에서 매개변수를 List로 가져온다.
			for (int i =0; i < items.size(); i++) {
				FileItem fileItem = (FileItem) items.get(i); // 파일 업로드창에서 업로드된 항목들을 하나씩 가져온다.

				if(fileItem.isFormField()) {
					// 폼 필드이면 전송된 매개변수 값을 출력한다. uploadForm.jsp의 <input tpye="text" />
					System.out.println(fileItem.getFieldName() + "=" + fileItem.getString(encoding));
				}else { // 폼 필드가 아니면 파일 업로드 기능을 수행한다.

					System.out.println("매개변수 이름 : " + fileItem.getFieldName());
					System.out.println("파일 이름 : " + fileItem.getName());
					System.out.println("파일 크기 : " + fileItem.getSize() + "bytes");
					if(fileItem.getSize() > 0) {
						int idx = fileItem.getName().lastIndexOf("\\");
						if(idx == -1) {
							idx = fileItem.getName().lastIndexOf("/");
						}
						// 업로드한 파일이름을 가져온다.
						String fileName = fileItem.getName().substring(idx+1);

						// 업로드한 파일 이름으로 저장소에 파일을 업로드한다.
						File uploadFile = new File(currentDirPath + "\\" + fileName);
						fileItem.write(uploadFile);
					}
				}
			}
		} catch(Exception e) {
			e.printStackTrace();
		}
	}
}
- /uploadForm.jsp 페이지에 접속해 업로드할 파일과 매개변수란에 문자를 입력하고 [업로드] 버튼을 눌러 본다.
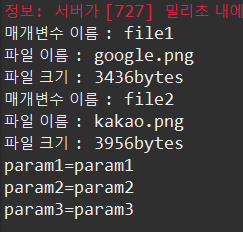
- 업로드 버튼을 누르면 업로드한 파일 이름과 크기, 입력하 매개변수 값이 IDE 콘솔에 출력된다.
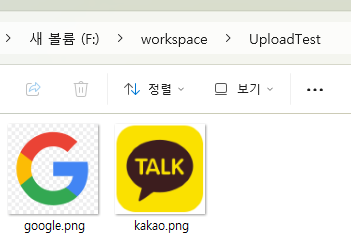
- 또한 지정한 경로에 파일이 저장된 것을 확인할 수 있다.
파일 다운로드
- 첫 번째 JSP에서 다운로드할 이미지 파일 이름을 두 번째 JSP로 전달하도록 first.jsp를 작성한다.
* first.jsp
<%@ page language="java" contentType="text/html; charset=UTF-8"
    pageEncoding="UTF-8"%>
<!DOCTYPE html>
<html>
<head>
<meta charset="UTF-8">
<title>Insert title here</title>
</head>
<body>
	<form method="post" action="result.jsp">
		<input type="hidden" name="param1" value="google.png" /><br>
		<input type="hidden" name="param2" value="kakao.png" /><br>
		<input type="submit" value="이미지 다운로드" />
	</form>
</body>
</html>
- 두 번째 JSP 파일인 result.jsp 를 생성한다.
- 이미지 파일 표시 창에서 <img> 태그의 src 속성에 다운로드를 요청할 서블릿 이름 download.do와 파일 이름을 GET
방식으로 전달한다.
- 다운로드한 이미지 파일을 바로 <img> 태그에 표시하고, <a> 태그를 클릭해 서블릿에 다운로드를 요청하면 파일 전체를
로컬 PC에 다운로드한다.
* result.jsp
<%@ page language="java" contentType="text/html; charset=UTF-8"
    pageEncoding="UTF-8" isELIgnored="false" %>
<%@ taglib prefix="c" uri="http://java.sun.com/jsp/jstl/core" %>
<c:set var="contextPath" value="${pageContext.request.contextPath }" />
<%
	request.setCharacterEncoding("utf-8");
%>
<c:set var="file1" value="${param.param1 }" />
<c:set var="file2" value="${param.param2 }" />

<!DOCTYPE html>
<html>
<head>
<meta charset="UTF-8">
<title>이미지 파일 출력</title>
</head>
<body>
	매개 변수 1 : <c:out value="${file1 }" /><br>
	매개 변수 2 : <c:out value="${file2 }" /><br>

	<c:if test="${not empty file1}" >
		<img src="${contextPath }/download.do?fileName=${file1}" width="100" height="100" /><br>
	</c:if>
	<c:if test="${not empty file2}" >
		<img src="${contextPath }/download.do?fileName=${file2}" width="100" height="100" /><br>
	</c:if>
	파일 내려 받기 : <br>
	<a href="${contextPath }/download.do?fileName=${file2 }">파일 내려받기</a>
</body>
</html>
- 이제 파일 다운로드 기능을 하는 서블릿을 작성한다.
- 파일 다운로드 기능은 자바 IO를 이용해 구현한다. 먼저 response.getOutputStream();을 호출해 OutputStream을
가져온다.
- 배열로 버퍼를 만든 후 while 반복문을 이용해 파일에서 데이터를 한 번에 8KB씩 버퍼에 읽어 온다.
- 이어서 OutputStream의 write()메서드를 이용해 다시 브라우저로 출력한다.
* FileDownload.java
package upload;

import java.io.File;
import java.io.FileInputStream;
import java.io.IOException;
import java.io.OutputStream;

import javax.servlet.ServletException;
import javax.servlet.annotation.WebServlet;
import javax.servlet.http.HttpServlet;
import javax.servlet.http.HttpServletRequest;
import javax.servlet.http.HttpServletResponse;

/**
 * Servlet implementation class FileDownload
 */
@WebServlet("/download.do")
public class FileDownload extends HttpServlet {
	private static final long serialVersionUID = 1L;

	protected void doGet(HttpServletRequest request, HttpServletResponse response) throws ServletException, IOException {
		doHandle(request, response);
	}

	protected void doPost(HttpServletRequest request, HttpServletResponse response) throws ServletException, IOException {
		doHandle(request, response);
	}

	protected void doHandle(HttpServletRequest request, HttpServletResponse response) throws ServletException, IOException {
		request.setCharacterEncoding("utf-8");
		response.setContentType("text/html;charset=utf-8");

		// 파일 저장소 위치
		String file_repo = "F:\\workspace\\UploadTest";
		String fileName = (String)request.getParameter("fileName");
		System.out.println("fileName = " + fileName);

		//response에서 OuputStream 객체를 가져온다.
		OutputStream out = response.getOutputStream();
		String downFile = file_repo + "\\" + fileName;

		// 파일 생성
		File f = new File(downFile);

		// 파일 다운로드 기능 구현
		response.setHeader("Cache-Control", "no-cache");
		response.addHeader("Content-disposition", "attachment; fileName=" + fileName);

		FileInputStream in = new FileInputStream(f);

		// 버퍼 기능을 이용해 파일에서버퍼로 데이터를 읽어아 한꺼번에 출력.
		byte[] buffer = new byte[1024*8];
		while(true) {
			int count=in.read(buffer);
			if(count==-1) {
				break;
			}
			out.write(buffer,0,count);
		}
		in.close();
		out.close();
	}


}
- 코드 작성 후 /first.jsp 페이지에 접속해 [이미지 다운로드] 버튼을 클릭해 본다.
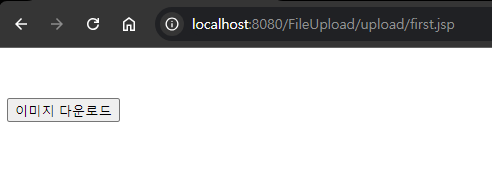
- [이미지 다운로드] 버튼을 누르면 result.jsp 페이지로 포워딩된다.
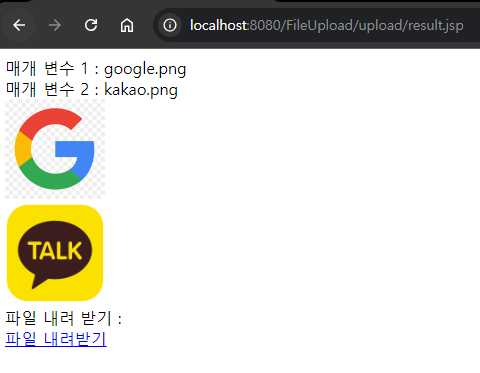
- "파일 내려받기" 링크를 클릭하면 두 번째 파일을 다운로드할 수 있다.
'JSP' 카테고리의 다른 글
| [JSP]문자열 처리 함수 (0) | 2024.08.15 |
|---|---|
| [JSP]포매팅 태그 라이브러리 (0) | 2024.08.15 |
| [JSP]다국어 태그 라이브러리 (0) | 2024.08.15 |
| [JSP]JSP 표준 태그 라이브러리(JSTL) (0) | 2024.08.15 |
| [JSP]커스텀 태그 (0) | 2024.08.15 |
- Total
- Today
- Yesterday
- Servlet
- html css
- script element
- javaserverpage
- 스프링 시큐리티
- httpServletRequest
- 네트워크
- Spring
- 서블릿
- JSP
- el
- CSS 속성
- 리액트
- 미들웨어
- Network
- 내장객체
- nodejs
- 세션
- CSS
- HTML
- react
- Spring Security
- Redux
- 인가
- 서브넷팅
- 제이쿼리
- Session
- Java Server Page
- Binding
- 스프링
| 일 | 월 | 화 | 수 | 목 | 금 | 토 |
|---|---|---|---|---|---|---|
| 1 | 2 | 3 | 4 | 5 | 6 | 7 |
| 8 | 9 | 10 | 11 | 12 | 13 | 14 |
| 15 | 16 | 17 | 18 | 19 | 20 | 21 |
| 22 | 23 | 24 | 25 | 26 | 27 | 28 |
| 29 | 30 | 31 |